Warning: Constant WP_DEBUG_LOG already defined in /data03/virt51751/domeenid/www.glamourrom.eu/htdocs/wp-config.php on line 189

Warning: Cannot modify header information - headers already sent by (output started at /data03/virt51751/domeenid/www.glamourrom.eu/htdocs/wp-config.php:189) in /data03/virt51751/domeenid/www.glamourrom.eu/htdocs/wp-includes/feed-rss2.php on line 8
How to – GLMR™ https://glamourrom.eu Experience newer firmwares on your older Samsung Galaxy smartphones for free. Tue, 11 Aug 2020 14:28:26 +0000 en hourly 1 https://wordpress.org/?v=6.2.2 https://glamourrom.eu/wp-content/uploads/2019/03/cropped-logo-uus-02-32x32.png How to – GLMR™ https://glamourrom.eu 32 32 HOW TO: Enable dark mode in Messenger https://glamourrom.eu/how-to/how-to-enable-dark-mode-in-messenger/ https://glamourrom.eu/how-to/how-to-enable-dark-mode-in-messenger/#respond Sat, 09 Mar 2019 18:56:13 +0000 https://glamourrom.eu/?p=6942 The post HOW TO: Enable dark mode in Messenger appeared first on GLMR™.

]]>

Facebook got something innovative for You guys – a messenger dark mode. It is designed for the OLED screens (which every Galaxy S series phone have). On OLED-type screens, black tone doesn’t affect battery consumption at all. Currently, it’s hidden from the settings, but there’s a nifty trick which can enable it on your phone.

Messenger will be rolling the Dark Mode out to everyone in the settings by the end of March 2019 — without having to perform any tricks.

The dark mode setting can be unlocked by simply sending a crescent moon emoji.

If dark mode enabled, it will show as a true black OLED mode where your pixels are turned off, so you’ll save battery life on phones with OLED screens like the iPhone XR or Galaxy S10. Which is ideal when you’re messaging people in bed at night. It’s a feature that users have demanded some time. The theme is still being worked on, which means that some cosmetic bugs are expected. Still, it’s already very usable.

It appears that dark mode will arrive as part of a wider Facebook Messenger redesign. Lately, Facebook has been changing trends. This dark mode update is most likely part of it’s minimal UX/UI look they have published this year.

The post HOW TO: Enable dark mode in Messenger appeared first on GLMR™.

]]>
https://glamourrom.eu/how-to/how-to-enable-dark-mode-in-messenger/feed/ 0
[IN-DEPTH] 3 ways to capture and debug logcat https://glamourrom.eu/how-to/3-ways-logcat/ https://glamourrom.eu/how-to/3-ways-logcat/#respond Fri, 05 Oct 2018 13:13:51 +0000 https://glamourrom.eu/?p=6814 The post [IN-DEPTH] 3 ways to capture and debug logcat appeared first on GLMR™.

]]>


Hello my lovely readers and GlamourROM fans.

I’ve run into so many questions from people regarding how to logcat. So I decided to write a guide for all of you which talks about 3 different ways and I’m sharing here only my preferences. Of course there are more methods, but at the moment I’m sticking with these.

Logcat methods:


  • Catlog (Android App)
  • Minimal ADB
  • Android Monitor(GUI)

Choose one and lets continue.

app-icons

Catlog


First of all you will need root if you choose this method, because it will give superuser rights to Android logcat app. Magisk rooting method is highly preferred. App I’m using in this tutorial is CatLog. Click here to download it.

App description:

Debug your apps. Find error stacktraces. See what your phone is saying about you behind your back. It’s all there in the system log, aka logcat!

catlog
Enter your tag or keyword
Select filter

Minimal ADB


Prerequisites:

  • Your device is plugged into your computer
  • You have USB Debugging enabled under Developer Options (Note: This may be listed as ADB Debugging on some ROM’s)
  • You have installed the necessary drivers and your computer is recognizing your device

Head over to AndroidFileHost site. Download installer from there. By default it will install to C:\Program Files (x86)\Minimal ADB and Fastboot. It is preferred to make shortcut. After install open the command line app. Test if your device can be found at all. I type “adb devices” and outcome will be like this:

PS C:\WINDOWS\system32> adb devices

List of devices attached

ad0117020d208b226b      device

Which says that device is perfectly recognized and you can proceed with it. You might drive into opposite response from terminal called device unauthorized. In that case you must revoke USB debugging on phone. Here is already written guide for that.

Priority lists:

  • V — Verbose (lowest priority)
  • D — Debug
  • I — Info
  • W — Warning
  • E — Error
  • F — Fatal
  • S — Silent (highest priority, on which nothing is ever printed)

You want to set it as error and above to filter unneeded ballast. Command will be like that:

adb logcat *:E >> %userprofile%\Desktop\log.txt

If you want to stop the logging press Ctrl + C or simply unplug your phone.

You will find log.txt transferred in your Desktop.

Android Device Monitor


My preferred method. Tool is deprecated but works really well. This zip is packed from android sdk folder.

Download this:

Extract it and start the tool by clicking on monitor.exe.

android-device-manager
Your device ready to debugging
Here you can filter your logs
Log filter itself

Really great GUI solution, all interactive and so on.

Filtering FC log simply write tag:AndroidRuntime to bar for example.

Analyzing logs:

Example of system crashing error:

E/AndroidRuntime: !@*** FATAL EXCEPTION IN SYSTEM PROCESS: main
java.lang.RuntimeException: Unable to start activity ComponentInfo{com.android.settings/com.android.settings.Settings}: java.lang.NullPointerException

Caused by: java.lang.NullPointerException
at com.android.settings.Settings.updateHeaderList(Settings.java:594)
at com.android.settings.Settings.onBuildHeaders(Settings.java:530)

For example in this above error this means that somewhere in your code something is set to null and you are trying to use it as though it isn’t.

The next few lines tell you where in your code you can find the error. I’ve removed all the unnecessary lines from the stacktrace. Stacktrace says that method named updateHeaderList returns a null value. Problem here is a mismatching ID and resource call happens at line 530.


List of tags you should seek for:

AndroidRuntime – this is the main reason of continuous FC like SystemUI crash

DEBUG – usually bootloop, caused due to incomplete binary or library

JavaBinder – similar to ART one

Zygote – Most likely happening due to unproper porting


You can send me a error log if it’s Glamour ROM related.

The post [IN-DEPTH] 3 ways to capture and debug logcat appeared first on GLMR™.

]]>
https://glamourrom.eu/how-to/3-ways-logcat/feed/ 0
Hidden Network Setting on Oreo – NO ROOT REQUIRED https://glamourrom.eu/how-to/hidden-network-setting-noroot/ https://glamourrom.eu/how-to/hidden-network-setting-noroot/#comments Mon, 20 Aug 2018 20:07:55 +0000 https://glamourrom.eu/?p=6598 The post Hidden Network Setting on Oreo – NO ROOT REQUIRED appeared first on GLMR™.

]]>

Showing a way to the hidden network setting. Tinkering with the system files of Galaxy Samsung S9+ I found that on system partition there is an app in privileged apps folder. It is called HiddenNetworkSetting.apk. Which seems to be a Samsung only implementation, as it doesn’t exist on Vanilla version of Android Oreo. Sounds like a enhanced Mobile Networks subsetting. Like it’s name says it is hidden from the user. But not anymore. I’ve got a way to show you. A rootless way.

Start off by downloading this app named QuickShortcutMaker. Next step is to go under activities section and from there type ,,Hidden Network Setting”. After choosing it, press try. Now comes a whole list of different network modes. Starting with GSM(EDGE) to the LTE selection. There is also a tab for the Band selection mode (which is experimental).

Options:

GSM ALL

WCDMA ALL

LTE ALL

GSM/WCDMA

WCDMA/LTE

Band selection mode

The post Hidden Network Setting on Oreo – NO ROOT REQUIRED appeared first on GLMR™.

]]>
https://glamourrom.eu/how-to/hidden-network-setting-noroot/feed/ 1
LZ4 image extraction on Android Oreo 8.0 https://glamourrom.eu/how-to/extract-lz4-image/ https://glamourrom.eu/how-to/extract-lz4-image/#comments Sun, 12 Aug 2018 18:51:22 +0000 https://glamourrom.eu/?p=6560 The post LZ4 image extraction on Android Oreo 8.0 appeared first on GLMR™.

]]>

Samsung Oreo firmwares use a new compression algorithm for their ext4 firmware files. It’s called a LZ4 format. You can’t open it with a DiskInternals Linux Reader on Windows. You need a tool for LZ4 image. I’m going to show how to use precompiled binary for file extraction. Github developer named Cyan4973 has released utility which allows to extract.

Manual way:

Follow these easy steps:

  • Download file from below.
  • Put in lz4 folder system.img.ext4.lz4 (which you extracted from the .tar.md5 file)
  • Open CMD line for the lz4 folder
  • Type lz4.exe -d system.img.lz4 system.img.ext4 (NOTE: LZ4 file must match the one you extracted from the tar file.)
  • Wait for the utility to finish, it will say something like that: ,,system.img.lz4 : decoded 2408398332 bytes”
  • Proceed to extract the newly created ext4 image


Brief example how to open Command Prompt and use cd command to the directory where you extracted these files.

In order to get “Open Powershell window” you must use SHIFT + RIGHT MOUSECLICK combination.

In next tutorial I will teach how to use ASSAYYED’s KITCHEN and proceed with complete extraction and deodexing the ROM.

Folder you are targeting
Click here to open Powershell
Type command and wait for it to finish
Here’s your newly created EXT4 image

Easiest way:

This is a most complete method. Without typing any lines of code. Saving You guys from making hands dirty. I’ve made a shell script for that. It requires that you have LZ4 v1.9.2 extracted already. Just extract this make.bat into a lz4_v1_9_2_win64 folder. When extracted into a root directory just double-click on it. Shell will prompt to overwrite if a previous lz4 image(s) exists.

NOTE: Files must be named in order to decode: system.img.lz4, boot.img.lz4, recovery.img.lz4, cache.img.lz4, hidden.img.lz4

The post LZ4 image extraction on Android Oreo 8.0 appeared first on GLMR™.

]]>
https://glamourrom.eu/how-to/extract-lz4-image/feed/ 10
How to remove PIN and face control on Android https://glamourrom.eu/how-to/remove-pin-face-control-android/ https://glamourrom.eu/how-to/remove-pin-face-control-android/#respond Fri, 06 Oct 2017 15:56:33 +0000 https://glamourrom.eu/?p=6406 The post How to remove PIN and face control on Android appeared first on GLMR™.

]]>

Bypassing Android lock

This article is just about how to get rid of pin code, fingerprint and face control on Android. I’m going to show you 2 methods. Each of them will work. One is a manual way, while other is automatical.

Quite a common problem on Android smartphones and tablets is that people tend to forget passwords, pin codes, patterns. Especially when they are newly created. Many errors can come up. For example fingerprint cannot be recognized due to the faulty fingerprint sensor.  If you have one of these issues, then this article is for You.

root explorer

Files description

  • gatekeeper.password.key – your lockscreen password
  • gatekeeper.pattern.key – your lockscreen pattern
  • locksettings.db, locksettings.db-shm, locksettings.db-wal – lockscreen database file. Which is your stored lockscreen settings
  • personalpattern.key – your Private Mode pattern
  • /data/biometrics contains all your fingerprint sensory related stuff. Including your personal fingerprint

These are present on Galaxy S8 running on Android Nougat aka 7.0. For CM or other releases files may vary. Such as:

  • gesture.key
  • cm_gesture.key
  • password.key

Basically getting rid of these files manually will clear your lockscreen safety lock. Without a need for a wipe. You’re happily covered if your device isn’t encrypted, but if it is you’re out of luck. Because you’ve got no access to the /data partition which stores these respective files.

Below I added a flashable zip which only requires custom recovery. It will do anything for you. Trust me.

Guide for dealing with flashable zip-s.

 Read more.


Also check out more guides.

The post How to remove PIN and face control on Android appeared first on GLMR™.

]]>
https://glamourrom.eu/how-to/remove-pin-face-control-android/feed/ 0
How to unlock Android Developer Settings https://glamourrom.eu/how-to/unlock-android-developer-settings/ https://glamourrom.eu/how-to/unlock-android-developer-settings/#respond Thu, 01 Jun 2017 14:11:20 +0000 http://glamourrom.eu/?p=6200 The post How to unlock Android Developer Settings appeared first on GLMR™.

]]>

Android Developer Settings

Every Android smartphone and Android tablet contains a hidden set of options called – Android Developer Options.

As the name says it’s meant for the developers originally – people who need additional built-in tools to test and debug software and apps they are writing for Android devices.

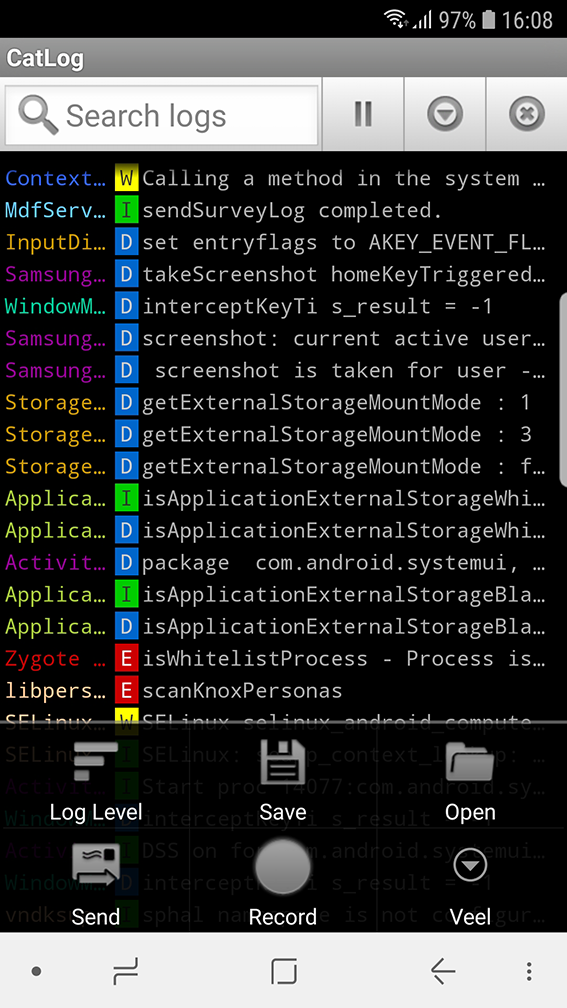
There are couple of ways that allows you to log, force GPU rendering, show activities, manage with processes or even enable debugging options (which gives you the best playground to play on).

Android Developer Options also allow you to draw debugging information on screen including layout bounds, updates on GPU views and hardware layers, and other information. It can even allow to make your phone respond faster after removing animation scaling times. Slight note: you can put your phone at risk when enabling the USB debugging, so proceed with caution.

Back in days before the 4.2 update, google had it visible by default, but with this release Google deliberately removed it since this feature is only meant for power users and developers.

This doesn’t affect OEMs as they have this feature by default disabled nonetheless.

There’s a simple method I’m going to show you. First of all there is an easy way to enable the developer settings on Android Phone.

It is still on the phone, so there’s no need to worry. Google hasn’t get rid of the development option menu. But this menu option has been removed from the plain menu view.

Let’s start

Here’s a way to get it back:


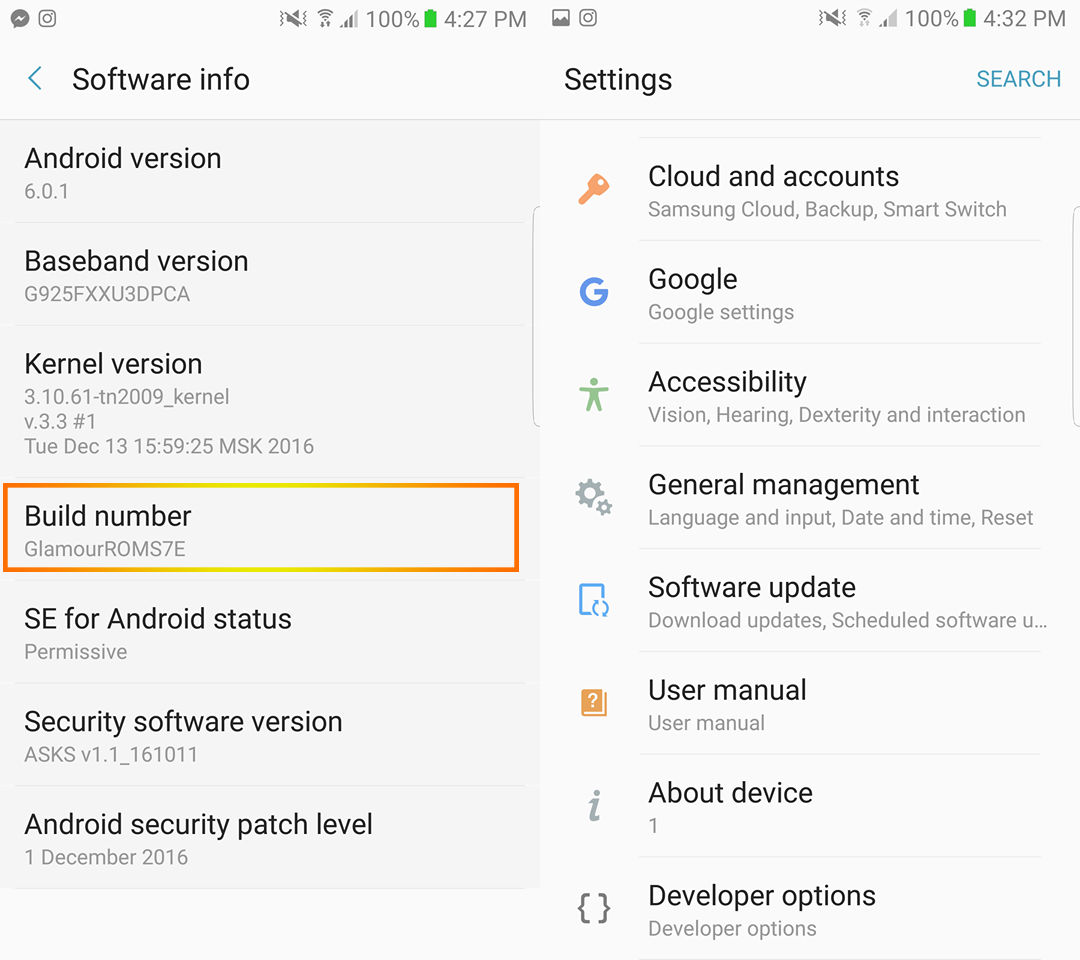
  1. Go to the settings menu, and scroll down to “About phone.” Tap it.
  2. Scroll down to the bottom again, where you see “Build number.” (Your build number may vary from ours here.)
  3. Tap it seven (7) times. After the third tap, you’ll see a toast menu that says you’re four taps away from being a developer. (Google makes you as a developer with few clicks, eh?) Keep on tapping, and BAM, you’ve got the developer settings back.

Below I added screenshots which will make it more clear.

Android Developer
1
Tap 7 times on the Build number
2
When everything done correctly this option will appear

USB Debugging

What’s so wonderful about that? First of all it allow you to control your phone through the ADB Terminal on PC.

It gives you near endless possibilities. You can push and pull files from the phone. You can make directories, you can pull any kind of information, like device status, battery level etc. The most important thing if you’re a developer. YOU CAN READ LOGS IN LIVE.

Tool I recommend to use is called: Minimal ADB and Fastboot

It is really simple to use as it saves you from the pain to install the whole android tools suite. For me it installed like 30 minutes.

I’m listing here few most used adb commands:

  • adb push (sends files to your phone) — adb push /path/to/local/file /sdcard/path/to/file
  • adb pull (receives files from your phone) — adb pull /path/to/local/file /sdcard/path/to/file
  • adb install (installs application) — adb install c:\nameofyourapk.apk
  • adb shell (begins shell connection with phone, this requires root)
  • adb reboot bootloader (reboots the phone into bootloader/download mode)
  • adb reboot (reboots phone)
  • adb reboot recovery (reboots phone into recovery)

The post How to unlock Android Developer Settings appeared first on GLMR™.

]]>
https://glamourrom.eu/how-to/unlock-android-developer-settings/feed/ 0